how to clean a kerosene lamp Electrifying an antique oil or kerosene lamp : 7 steps
Antique oil lamps are not only beautiful decorative pieces, but they also provide a warm and nostalgic ambiance to any room. However, over time, these lamps can accumulate dirt and grime, which not only affects their appearance but also hinders their functionality. In this post, we will guide you on how to clean and maintain your antique oil lamps effectively.
Step 1: Gather the necessary supplies
Before you embark on cleaning your antique oil lamps, it is essential to have the right supplies on hand. You will need:
- A soft, lint-free cloth
- Mild dish soap or a specially formulated lamp cleaner
- A small brush with soft bristles
Step 2: Handle with care
Antique oil lamps are delicate, so it’s crucial to handle them with utmost care. Always make sure to support the lamp from its base and avoid putting excessive pressure on its fragile parts.
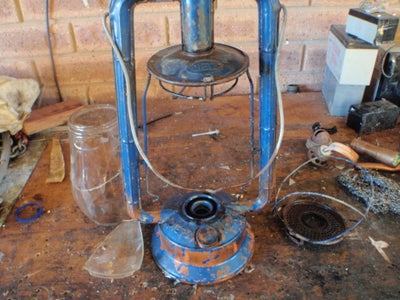
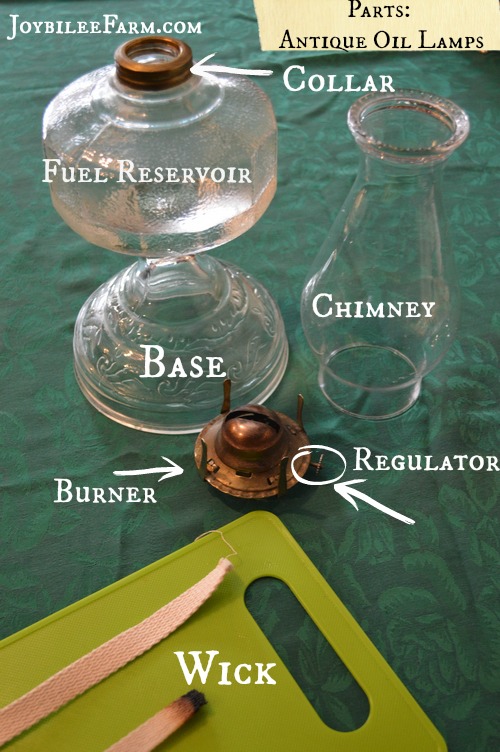
Step 3: Remove the chimney and the burner
To clean your antique oil lamp, start by carefully removing the chimney and the burner. The chimney is the glass cylinder that covers the flame, while the burner holds the wick and controls the lamp’s fuel flow.
 Step 4: Clean the chimney
Using a soft cloth, gently wipe the chimney to remove any soot or residue. If the chimney requires further cleaning, dip the cloth in a solution of warm water and mild dish soap, and carefully clean the glass. Make sure to dry it thoroughly before reassembling the lamp.
Step 5: Clean the burner
Take the burner and disassemble it by removing the wick, the wick holder, and the flame spreader. Use a small brush with soft bristles to clean each component thoroughly. If the parts are heavily soiled, you may soak them in a solution of warm water and mild dish soap. Rinse and dry them well before reassembling.
 Step 6: Clean the base
Gently clean the base of the antique oil lamp using a soft cloth and mild dish soap. Be cautious not to wet any areas that can be damaged by moisture. Dry the base thoroughly before reassembling the lamp.
Step 7: Final touches
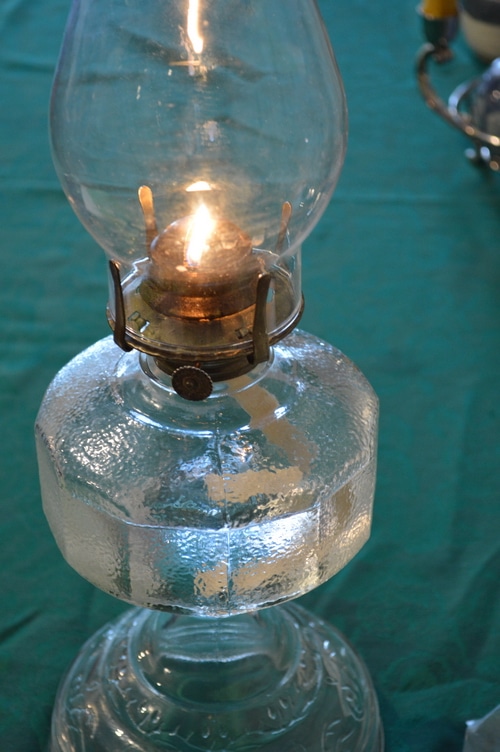
Once you have cleaned all the components of your antique oil lamp, carefully reassemble everything. Place the cleaned chimney back onto the base and reattach the burner with its wick. Ensure that each part is securely fitted to avoid any mishaps.
By following these simple steps, you can effectively clean and maintain your antique oil lamps, preserving their timeless beauty and functionality for years to come.
Remember, always exercise caution when dealing with open flames and flammable materials. If you feel unsure about cleaning or maintaining your antique oil lamps, it’s best to consult a professional in lamp restoration to avoid any mishaps.
If you are looking for How to Clean Antique Oil Lamps - Joybilee® Farm | DIY | Herbs | Gardening you’ve came to the right web. We have 5 Pictures about How to Clean Antique Oil Lamps - Joybilee® Farm | DIY | Herbs | Gardening like An antique kerosene lamp brings a little history into your home, but, How to clean antique oil lamps | Joybilee® Farm | DIY | Herbs | Gardening and also An antique kerosene lamp brings a little history into your home, but. Here it is:
How To Clean Antique Oil Lamps - Joybilee® Farm | DIY | Herbs | Gardening
 joybileefarm.comlamps kerosene joybileefarm
How To Clean Antique Oil Lamps | Joybilee® Farm | DIY | Herbs | Gardening
joybileefarm.comoil lamp antique clean lamps bright clear cleaned newly smoke burn will
Electrifying An Antique Oil Or Kerosene Lamp : 7 Steps - Instructables
www.instructables.comkerosene electrifying dissembling
An Antique Kerosene Lamp Brings A Little History Into Your Home, But
 www.pinterest.comkerosene ehow
How To Clean Antique Kerosene Lamps | Homesteady | Kerosene Lamp, Lamp
 www.pinterest.comkerosene hunker
How to clean antique kerosene lamps. Kerosene hunker. An antique kerosene lamp brings a little history into your home, but